This may be my favorite tutorial in the Gelli Plate series. I love using a paint brush to make designs to print on my papers. I think you will too.
SUPPLIES:
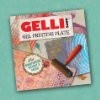
- Gelli Plate (I'm using a 6"x6" plate)
- Paper (I'm using 4"x6" scrapbook paper)
- Assorted Paint Brushes (I'm using the Dina Wakley Media Brushes)
- Assorted Paint (I'm using Dina Wakley Media paints)
- Craft Mat or Palette Paper
Previous Gelli Plate Tutorials:
- Gelli Plate Intro, creating simple backgrounds
- Gelli Plate and Masks
- Gelli Plate and Texture
- Gelli Plate and Stencils
HOW TO
STEP ONE: Squeeze out a few dabs of paint on your craft mat, and dip your paint brush in one color.
STEP TWO: Start drawing with your paint brush and add different colors in. I drew half circles with assorted colors to make full circles.
STEP THREE: press your paper into the Gelli Plate
STEP FOUR: Pull the papers up to reveal the print.
NOTE: There is plenty of paint leftover on the plate, so I press more paper into them for more impressions.
As you can see, the circles are much more subtle but still really great impressions.
REPEAT steps TWO - FOUR until you've used up the paint on your mat... no wasting yummy paint.
Here's my finished cards! Well, actually they aren't finished. I'm going to add some finishing touches to the cards next week. Be sure to come by again next Monday as I finish up these cards to be used in my weekly scrapbook pages.
Disclosure: This post contains affiliate links. I will receive a small commission on purchases made, using my link. Thank you for your continued support in keeping this blog running and to help purchase supplies for the tutorials and inspiration!


Nice post! This is a very nice blog that I will definitively come back to more times this year! Thanks for informative post. Paint by numbers Australia
ReplyDeleteGood Post
ReplyDelete123.hp.com/dj3630
Interesting painting. This like painting are in exhibitions. But now we can make it at home. Similarly, I am help you to make memories to kill the pests. You can do it from this Pest Extermination Company in New York service and get to know more about.
ReplyDeleteI'm glad to see the great detail here!. interior painting services in Long Beach, CA
ReplyDeleteThank you for some other informative website. The place else may just I get that kind of information written in such a perfect method? I have a venture that I am simply now running on, and I’ve been at the glance out for such info. interior painting services in Long Beach, CA
ReplyDeleteI had no idea how I would do my homework, but then I found this site business-review.eu/business/media-marketing/why-you-need-a-college-essay-writing-service-and-how-to-find-it-239520 where they write any written work for you, and there is information about why you need a college essay writing service and how to find it
ReplyDeleteGreen wood" refers to freshly cut or recently harvested wood that still contains moisture. This wood has not undergone the drying or curing process, making it more pliable and susceptible to warping. Green wood is commonly used in woodworking projects where shaping and flexibility are important, but it requires drying to enhance its stability for long-term use.
ReplyDeletehearsay in court
virginia uncontested divorce
virginia personal injury settlements
uncontested divorce in va
Heather Greenwood Designs is a creative blog focused on art journaling, mixed media, and faith-based crafts. It features tutorials, DIY projects, and artistic inspiration for crafters. The blog blends creativity with spirituality and personal expression. It’s ideal for artists seeking faith-inspired creative techniques.
ReplyDeleteBetVisa betting casino
Mostbet bangladesh betting