

I'm super excited to share with you some tutorials using one of my favorite tools, the Gelli Plate. I use it a lot and I can't believe I haven't shared it with you yet. It is definitely in my top ten tools for mixed media art. I have the 6"x6" one, but really want all of them, there is just so much you can do with both the little ones and the larger ones. I also think the circle one is really cool too.

Today I'm going to show how I prep my papers and then a base print with the Gelli Plate. This is going to be a series because there is just so much you can do with it. Have I told you how much I love this tool?!
SUPPLIES:

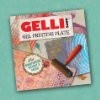
- Gelli Arts Gel Printing Plate (I'm using the 6"x6" plate)
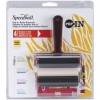
- Soft Rubber Brayer
- Palette Knife
- Paper (I'm using scrapbook paper from my stash)
- Gesso (I'm using Liquitex Professional)
- Craft Mat
- Assorted Acrylic Paints (I'm using assorted Dina Wakley Meida Heavy Body Acrylic Paints by Ranger and Liquitex Basics Titanium White)
GESSO PREPPING YOUR PAPERS
I want to prep my paper with a thin coat of gesso before I begin. This is totally personal preference, and you can skip this part. The reason I do it is to conserve paint. Because it is a barrier, the paint won't soak into the paper and then you can see the nice bright and vibrant colors since they sit on top of the gesso.
STEP ONE: Pour out some Gesso and dip your palette knife into it.

STEP TWO: spread it on your papers in a nice thin coat. You don't need a lot, a little goes a long way.

STEP THREE: Let it dry. I even left a few areas without the gesso. This will give it a different effect and that's the fun part of mixed media.

GELLI PRINTING BACKGROUND
Here's where the fun part begins. No too prints will ever be the same and that's what makes this so much fun. As you can see, I don't clean my plate off. The fun in this is that I'll transfer some of that leftover paint onto my prints and it makes for a really cool effect and texture.STEP ONE: add little dots of paint, (not a lot) in a few different colors onto the plate.

STEP TWO: using your brayer, spread it around to blend the colors into a thin layer

STEP THREE: lay some paper over the top and press down with your hand or your brayer to transfer the paint from the plate to your paper. I have layered two 4"x6" cards on top.

STEP FOUR: Pull back your cards and VIOLA! Aren't they gorgeous?! But WAIT, I'm not done yet!

Continue to repeat the steps over and over again with different colors and layers of gelli printing.

This is too much paint, just FYI... OOPS!!!

It's ok though, just don't press down as hard and let it dry longer before you add more layers.

You can see the plate on the left, it still has a good amount of paint on it...

Since it still has a good amount of paint on it, I'm going to get another print from it, WOOT!!!

This time I pressed down to get a good print since the paint was a thinner layers... Look at the blue flecks of paint that was leftover from the plate, YUM!

It's all about the layering and adding more color. As you can see I'm sticking to colors that are close to each other on the color wheel by choosing purples, pinks, reds, and oranges. If I were to add greens or blues, I'd get a muddy color that I don't want... for now!

Now these cards are really starting to look yummy and very fallish.

I still have some color left over after that print... but not enough for another print...

So, I'm adding more paint on top of it, to help pick up the leftover paint.

This is what my cards look like after adding those layers of printing. They totally remind me of the fall colors outside right now. I can't wait to show you what you can do with these next week!


Disclosure: This post contains affiliate links. I will receive a small commission on purchases made, using my link. Thank you for your continued support in keeping this blog running and to help purchase supplies for the tutorials and inspiration!


It was very useful for me and I got a lot of info to your post. I am always following your blog, please update them...
ReplyDeleteSocial Media Marketing Courses in Chennai
Social Media Marketing Training in Chennai
Pega Training in Chennai
Tableau Training in Chennai
Power BI Training in Chennai
Primavera Training in Chennai
Unix Training in Chennai
Oracle Training in Chennai
Oracle DBA Training in Chennai
Regular visits listed here are the easiest method to appreciate your energy, which is why why I am going to the website everyday, searching for new, interesting info. Many, thank you!
ReplyDeleteData Science Course
Impressive. Your story always bring hope and new energy. Keep up the good work.
ReplyDeleteData Science Training
Very informative post ! There is a lot of information here that can help any business get started with a successful social networking campaign !
ReplyDeletebest data science institute in hyderabad
This is the Forum Submission Sites List in India to get dofollow back links to enhance DA and also of your website to boost online track record as well as brand name presence.
ReplyDeleteSan Francisco Deluxe Sightseeing Tours brings visitors and natives alike to the best sightseeing spots of the Golden City. Common destinations on some of their hop-on, hop-off tours include the Golden Gate Park, the Golden Gate Bridge, Fisherman’s Wharf, the Palace of Fine Arts, Ghiradelli Square, Fort Mason, and the Civic Center. San Francisco Hop On Hop Off
ReplyDeleteI like this article for artificial intelligence.I was searching over search engines and found your blog and it really helps thank you very much.
ReplyDeleteWinrar Crack Total Variation gives you a graphical interface that makes use of mouse and menu and command line interface. WinRAR key is easier to operate with than a number of other archiving programs, this incorporates a specialised “wizard” way which permits quick entry to simple https://freeprosoftz.com/winrar-crack-2022/
ReplyDeleteWindows 12 clients can anticipate a totally new and magnificently gorgeous point ofinteraction, which will surely satisfy all clients.windows 12 activator
ReplyDeleteBest plug! this is an each level of simple to apply weblog that I can conclusively come steerage to more noteworthy age this yr! gratitude for educational announce. Download Bandicam crack
ReplyDeletethis is a particularly wonderful helpful asset which you are offering and you find the money for it away for justifiable. I truly like seeing site that arrangement the charge of providing an energies helpful asset for excuse. Convertxtodvd Cracked
ReplyDeleteCharming, notice. I just tracked down your blog and expected to declare that i've esteemed examining your weblog posts. Once more after every one in all degree of part of, I can really get involved with your feed, and that I objective you could form quickly! https://wishesquotz.com/birthday-wishes-for-father/
ReplyDeleteNTLite 2 Crack
ReplyDelete
ReplyDeleteIDM Crack with fixed free download is serious strong regions for a fastest application that can accelerate up-to on different occasions. Right now you can download any records you need using this free Download application. Regardless you totally get an essential assortment from the power site. IDM Crack
Thanks for sharing this great article we appreciate it, we provide snap chat story video download freely and unlimited.
ReplyDeleteserials bank
ReplyDeleteuraqt.xyz Entertainment information and creative ideas.
ReplyDeletewe do if you're able to get this give good results effectively you making use of YTD Video Downloader Crack this software have a very exceptional ability to download.
ReplyDeleteAnyDesk is use to control you own computer from any remote place easily.
ReplyDeletehttps://thepcsoft.com/anydesk-crack-latest/
Window 10 Product Key
ReplyDeleteWindow 10 Product Key is great software which is use to enhance the working in system.
This is amazing content, and I would like to read more inspirational and informative posts like this. Becoming Alteryx certified professional by enrolling in a course program given by 360DigiTMG will help you learn how to automate work and keep yourself updated with the latest data analytics and data science trends.data science course in KL
ReplyDeleteThis is amazing content, and I would like to read more inspirational and informative posts like this. Becoming Alteryx certified professional by enrolling in a course program given by 360DigiTMG will help you learn how to automate work and keep yourself updated with the latest data analytics and data science trends.power bi course malaysia
ReplyDeleteThis is amazing content, and I would like to read more inspirational and informative posts like this.
ReplyDeletehashtags for instagram
you are the fantastic infoatmion HOW TO DEAL WITH A GIRLFRIEND WHO WANTS TO WAIT UNTIL MARRIAGE
ReplyDeleteCreate dynamic mixed media art with a 4-step Gelli Plate intro. Start by applying acrylic paint to the plate, then make designs using stencils or found objects. Press paper onto the plate to transfer the design. Experiment with layering and adding textures for unique results. "Your comment is like a burst of confetti, adding joy to our blog. Each word is a brushstroke on the canvas of conversation, creating a vibrant tapestry of ideas. We eagerly await your next insight, as your contributions light up our digital world. Thanks for being our comment superstar!" abogado de delitos sexuales de nj
ReplyDeleteThe roller painting brush creates impression more or less like a fingerprints. This makes painting looks beautiful. Step by step procedure with pictures makes the blogs more easy to understand on how to create plate design. Keep sharing more good blogs. Traffic Lawyer Fairfax VA
ReplyDelete"Discover, explore, and optimize your hashtag game with our user-friendly platform! Elevate your social media presence effortlessly.#HashtagHeaven #BoostYourReach #SocialMediaSuccess"
ReplyDeletevalentine hashtag
I appreciate you sharing this excellent work!`Defensa Criminal Abogado Condado Prince William
ReplyDeleteDive into the world of mixed media art with our 4-step Gelli Plate Intro tutorial! Learn how to create stunning textures and layers using this versatile tool. From basic techniques to advanced tricks, we'll guide you through each step of the process, helping you unlock your creativity. Whether you're a beginner or seasoned artist, this tutorial is sure to inspire and elevate your mixed media creations. iget vape
ReplyDeleteKeep it Up.Adobe Premiere Pro Crack
ReplyDelete
ReplyDeleteAcknowledges for paper such a beneficial composition, I stumbled beside your blog besides decipher a limited announce. I want your technique of inscription.
Do I Need An Injury Attorney In Maryland Montgomery
A 4-step Gelli Plate mixed media tutorial introduces you to the basics of using a Gelli Plate for creating textured, layered prints. In the first step, you'll apply acrylic paint to the plate, using brayers or brushes to create your desired background.protective order virginia firearms
ReplyDeleteEvery piece of content you create reflects an incredible level of dedication and passion, as you go beyond just sharing knowledge by also inspiring curiosity, encouraging deeper thought, and motivating readers to explore topics with a fresh perspective.
ReplyDeleteUSA Jacket Store
PassFab Android Unlocker Crack is a supportive new software for device. Nowadays the director is title to undo a useful application to eradicate the show protected and hunt engines padlock in a simple.
ReplyDeletePassFab Android Unlocker Crack
ReplyDeletePinterest video download tools are super useful for saving creative ideas, tutorials, and inspiration directly to your device. They make it easy to keep favorite content offline, whether it’s DIY projects, recipes, or travel guides. Quick, reliable, and free—Pinterest video downloaders are a must-have for anyone who loves collecting and revisiting great ideas.Pinterest Video Download
sentinelforte explores the intersection of technology, privacy, and cybersecurity—bringing readers reliable insights that matter. At sentinelforte, every complex concept is turned into clear and empowering guidance for safer digital living.
ReplyDeletePC Privacy Shield Crack is outstanding software seems to have electronic substantial draw, include precedent surfing action also check information, will be removed through over creation. This creation has newest purpose.
ReplyDeletePC Privacy Shield Crack
30 Creative Instagram Reels Ideas for Content Creators
ReplyDelete/ Mini-lessons are short videos in which you explain a specific topic in a simple and clear manner. They help your audience learn something useful in a short amount of time. You can explain a concept by breaking it down into parts, share a brief piece of information, or teach a fundamental idea that your viewers can easily understand and remember.