
Last week I shared an intro to creating backgrounds using a Gelli Printing Plate. This week we add another step to the process and and use some masks.

This is really where the fun begins, when you start adding more texture to your backgrounds. I'm going to use a contrasting color and stick with the greens and blues. Before you begin this step you need to make sure your backgrounds are completely dry so they don't muddy the colors. Have fun and I can't wait to see what you guys start creating with your Gelli Plates.
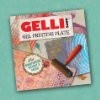
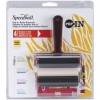
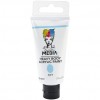
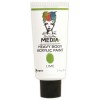
SUPPLIES: 6x6 Gelli Plate, Brayer, Masks (these are cut files I cut with the Silhouette Portrait from Sillhouette Stencil Material), paper with Gelli printed backgrounds, assorted acrylic paint (using Dina Wakley heavy body acrylic paints)

4 STEP HOW TO
A lot of this will look familiar to you, it's very much like the introduction/background tutorial, we just add the masks in between the steps.- STEP ONE: add dabs of assorted colors that are close to each other on the color wheel (so you don't make mud)

- STEP TWO: using your brayer, spread and blend the paint dabs together.

- STEP THREE: place your masks on top.

- STEP FOUR: place your paper with the painted side down.

- STEP FOUR(b): add a piece of scratch paper (I'm using deli paper) over the top so you don't get your fingers messy and/or to get a really cool print to use elsewhere.

- STEP FOUR(c): press down firmly and/or use your brayer to really get some firm pressure

See? This is why I use deli paper that I can cut out and use in another project for collage... how cool is that?!

Pull up your paper to see the pattern showing up. YUM!

JUST KEEP PRINTING!
I don't like to waste paint, so when I pull up the masks, there is that image remaining with leftover paint.
So, I add some more paper on top and press down firmly

When I pull it up, you'll see what's called a "ghost image". You can lightly see the circle and leaf images on the backgrounds.

I can never do just one piece of paper at a time, so let's do it again! Let's repeat the same steps to get some more impressions.

You can see here, I went thicker with the paint to test out if the image will be more pronounced.

YUM! I just love these circle and leaves!

Adding a new piece of paper to the top to see what I get.

I'm using the same piece of deli paper but I turned it 90 degrees to make a framed print.

Yes, I like the thicker paint better, you can really see the print now.

Isn't this pretty? I've got tons of paint left for another impression.

Adding a few more cards on top, layering them to get different areas.

Oh gosh, I love this "ghost image" and really love using more paint with these. Good lesson learned by experimenting!

Check out my deli paper frame! So much fun!

I'm finding that I really like the "ghost images" so I'm going to do my first print on the deli paper.


This is so much fun! I love how it turned out on the deli paper and can't wait to use this in some of my collage projects.

Now I'm going to add some of the cards back on to get the "ghost image".

I went back and did another layer on top of other layers and added more blue to some of the cards.

Aren't these YUMMY?!?! I seriously LOVE playing with the Gelli plate and masks. I love how some of the images are more pronounced and some are much more subtle. I can't wait to show you what I do with these next week!


Disclosure: This post contains affiliate links. I will receive a small commission on purchases made, using my link. Thank you for your continued support in keeping this blog running and to help purchase supplies for the tutorials and inspiration!


Absolutely a nice and creative blog and handicraft, artwork blog. Thanks a lot for sharing.
ReplyDeleteLove this. I have started using masks myself recently. So addictive..love your work
ReplyDeleteh jgyhghh gh
ReplyDeleteI have seen your best method of creating background using a gelli printing plate which you share with us last oct 2019. This another step to the process and and use some masks is also really helpful for the man. This time to protect coronavirus we need also use face mask. See some high-quality face mask making machine https://www.testextextile.com/product/medical-face-mask-machine/
ReplyDeleteThank a lot. You have done excellent job. I enjoyed your blog . Nice efforts face masks
ReplyDeleteOne popular method involves the use of reverse osmosis, but the down side to this method is that for every gallon of clean water you produce, you waist two gallons in the production. Bacterial Filtration Efficiency Tester
ReplyDeleteI am new to making art, but I have a gelli plate and I have been playing with it...thanks for the great ideas!
ReplyDeleteI just got my Gelli plate a week ago. I’m really liking it!! I love the “speckled” look with your papers, what type of paper do you use? Thank you for showing your beautiful work....☺️
ReplyDeleteThis comment has been removed by the author.
ReplyDeleteThanks for sharing this amazing post. I am A Sales Worker at Safe+HEALTH that is a mask production company which makes the best face mask for pollution and antimicrobial face mask. Safe+Health makes the best breathable mask that are soft and comfortable and are affordable in price so you can buy it without any cost issue.
ReplyDeleteI've been looking for info on this topic for a while. I'm happy this one is so great. Keep up the excellent work. Stickers 5 Fitzwilliam Square
ReplyDeleteLike most web designers, you can only try to navigate between Valid XHTML know-how and design & usability requirements. The "good" news is that with time, you can get pretty good at debugging your work code, Just don't be surprised that you haven't actually designed anything all week.Web Design Galway
ReplyDeleteThis isn't really prompted on the grounds that observing and keeping up the quantity of devotees would be very overwhelming. buy twitch followers
ReplyDeleteI liked your way to represent such informative thoughts. Here you have shared an amazing article, this article provides a new idea us. fashionable face mask
ReplyDeleteWe all want our home to be aesthetically pleasing. In order to do this, we need paint both the outside and inside of our home. However, you need hire expert painters to do this painting project. Contact Pelican Paint Group if you are looking to employ best house painters New Orleans, since they are the best in the business.
ReplyDeleteCould you give us an illustration of an impediment on a social stage that you have encountered? article source
ReplyDeleteI am so grateful for your blog post. Really looking forward to read more. Great.
ReplyDeleteinstagram downloader
Any dormant consideration won't typically acquire way too many supporters. Instagrammers frequently have a tendency to unfollow sedentary balances.
ReplyDeleteInstagram Likes kaufen
This write-up includes several of the very best info on this subject. I discovered this understandable and also intriguing to read. This is good material.House Painting Liverpool
ReplyDeleteHouse Painters Liverpool
This is my first visit to your web journal! We are a group of volunteers and new activities in the same specialty. Website gave us helpful data to work. cool masks
ReplyDeleteMajor thanks for the blog article. Really thank you! Much obliged.
ReplyDeleteyt mp3 converter
Hii,
ReplyDeleteThis is great and awsome post for me. i loved to read your blog. it's really-really amazing. thanks for inspired me by your blog.Buy Body Massage Essential Oil Online
Hey, this is a very nice article, and my all dot clear. thank you so much. If you want to Buy the Unique Carpet Tiles in UAE then Visit us.
ReplyDeleteThis article is very informative. I like it very much. For more information Click Here.
ReplyDeleteThank you for sharing such a nice information. I like it very much. For more information Visit Us.
ReplyDeleteHey, this is a very nice article, and my all dot clear. thank you so much. If you want the information best ann's cottage voucher code then visit us.
ReplyDeleteThank you for sharing such nice blog. I like it very much. I love home improvement. For more information Click Here.
ReplyDeleteThank you There Is certainly a lot to learn about mold remediation company, I really like all the points you've made.
ReplyDelete