This tutorial was supposed to come later in this series of using mists and/or spray inks, but earlier this week a question was brought to my attention and so I decided to move this one up a few weeks.
Sometimes mixing gel medium with Gelatos can be too thick for some stencils. This is understandable especially with the Golden brand gel medium.
I have great news though! You can also mix your mists or spray inks into gel medium to use with your stencils. Since it's such a wet medium it thins it out and makes it easier to spread into some of the more detailed stencils. So, let's get right to it!
Supplies:
- paper
- gel medium
- mist/spray ink
- stencil
- palette knife or popsicle stick
- craft mat or palette paper
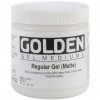
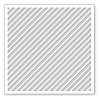
I used assorted Studio Calico Project Life kit cards and grid cards for paper, but you can use any paper you'd like, including your art journal or old book paper. I also am using Dylusions Calypso Teal Ink Spray, Golden Matte Gel Medium, and Simon Says Stamp Diagonal 6"x6" stencil.
PREP YOUR GEL MEDIUM
First we're going to scoop out a good amount of gel medium. I would probably use a good amount and create a few cards. It will be easier when mixing in the ink spray to not make it too thin.
Next, we will add a few drops of the mist. I had a little bit too much caffeine and had some shaky hand and ended up pouring out a bit more than I wanted... but it all worked out perfect, so I'm glad I had a big scoop of gel medium to mix it with.
Mix it all up. You want it to be a creamy consistency, but not too wet. If it gets too wet, you can add in some more gel medium.
LET'S GET STARTED
First, you'll lay your stencil over your paper or journal card.
Next, you'll scoop up some of the gel medium and drop it over your work.
Now you're going to spread it across your stencil being sure to get into all the grooves.
I do have a tip for stencils like this one. You want to be sure you go along the diagonal lines rather than against the lines.
The lines are so long that going against them will move your stencil. Also, this will make the lines more clean without leaking underneath the stencil.
VOILA
After you've filled in all the areas you want to fill, remove your stencil.
You're going to want to set it aside for awhile to dry completely before doing anything else with it.
Once dry, you can add it to your pocket album or add photos and embellishments and journaling. I'm thinking it would be fun to journal in between the lines on these!
I think this is going to be one of my new favorite stencils. I love diagonal stripes. Oh... it might be fun to make the stripes different colors, like a rainbow!!! I think I know what I'm doing next!
Disclosure: This post contains affiliate links. I will receive a small commission on purchases made, using my link. Thank you for your continued support!


0 comments:
Post a Comment