
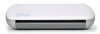
YAY, we are here! My favorite part of my workflow is the print and cut feature on my Silhouette Portrait! Seriously, I can't imagine doing my weekly pages without this feature!

So, I have a lot to show you, but I've taken tons of screen shots so you'll see how easy it really is. I have been asked many times if I ever regret getting the Silhouette Portrait rather than the Silhouette CAMEO. I can confidently say that I don't ever regret getting the smaller machine.
I am a hybrid girl and my printer is a letter-sized printer. I have no reason to "need" the bigger machine. Also, I work in 4"x6" or 3"x4" pockets for my scrapbooking. It's very rare for me to create a 12"x12" layout. Even my art journal pages are letter sized or smaller, so no need for the larger format. If I did more traditional scrapbooking though, I'd probably like the option to be able to cut more at a time, but that's pretty rare.
I'm sharing my Week 35 page here again, so you can see all the stickers I've printed and cut with the Silhouette Portrait and added to the page.

NOTE: All digital product shown are from the September 2014 BYOC collection at The Lilypad, and I'm in LOVE LOVE with it!
HOW TO
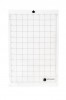
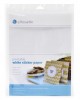
Let's get started on this fun and super easy tutorial.- 1) First you want to set up your page for a letter sized canvas, unless you have a wide format printer and can print on larger paper. Though, I am using the Silhouette White Sticker Paper, which is letter-sized. I'm using the Portrait cutting mat, but if you have a CAMEO, you'll want to set your cutting mat to the correct mat you are using.

- 2) Open your Registration Module

- 3) When you click on "style" a drop down menu will pop up and you'll choose "Type 1". Note: I usually fill my page, but you can adjust the bottom margin larger to save paper for later.

- 4) I split my monitor screen in half with the Silhouette Software on the left and my windows folder of digital scrapbook supplies on the right. I then click and drag what I want onto the Silhouette canvas.

- 5) After I've dragged everything I want to use over to the canvas, I want to scale things down to fit. Remember, I'm using these in my Project Life® Design A page protectors and so I need to re-size them to fit inside the those pockets. There are three ways to re-size your elements. First, open the Scale Module
- 5a) There are pre-determined ratios you can choose from, I click on 50% the most.

- 5b) You can also re-size to a specific measurement, be sure "lock aspect" is checked so that it doesn't distort your element.

- 5c) You can choose your own scaling ratio, I like to use 75% a lot, especially if I think 50% is too small.

- 6) I like to duplicate some of the elements, especially labels and little elements like flowers and hearts. There is a Duplicate Module, but I usually just right-click on the element and choose "duplicate" from the drop down menu.

- 7) If there is an element that doesn't fit on the canvas, you can click on the Rotate Module.

- 7a) and choose from the different options or manually change the number if the option isn't available.
- 7b) another option is to click on the element, then click on the little green circle on the top and then use your mouse to rotate it around until it fits

- 8) After I've filled up my page or moved up my bottom margin if I don't want to fill my page, I click on the Trace Module

- 9) Click on "Select Trace Area" then click your mouse in the upper corner and drag down to the opposite corner until your box is around all the elements

- 10) In the menu, un-check "high pass filter" and move the "threshold" to 100. This will turn everything that isn't pure white, yellow. As you can see the centers of my labels are pure white so it doesn't pick it up. Since I don't want that center part cut out, I'm going to choose "trace outer edge". If I wanted the centers cut out of something, like a tag or word art, I would choose "trace".

- 11) You will see a red line around everything showing your cut lines. Now I'm ready to print.

- 12) I'm using a Canon PIXMA, so my settings are for that machine, but you'll want to print at the best quality you can, and make sure you do not have "borderless printing" checked off (borderless printing will enlarge your print and cause your machine to make inaccurate cuts... well technically, the machine makes correct cuts, it just looks off because your print is off) Ask me how I figured that out, LOL... I might have been in tears thinking my machine was broken, until it dawned on me.

- 13) Go to the Cut Setting Module

- 14) Choose what medium you printed on, I'm using Silhouette's White Sticker Paper, but if you're using cardstock be sure to select the right weight setting.
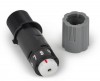
- 14a) Once you've chosen your medium, check to make sure your blade is set to the provided number
- 14b) Once you've checked everything to make sure it's set up correctly, click on "send to Silhouette"

- 15) Line up your print on the cutting mat and load it into the machine, then press "start"

- Lastly, watch your machine do it's magic! It's so much fun to watch! After it's done cutting, unload your paper, peel off your stickers and add them to your project. VOILA!!!

Disclosure: This post contains affiliate links. I will receive a small commission on purchases made, using my link. Thank you for your continued support!


0 comments:
Post a Comment