
I had so much fun decorating for my daughter's Frozen inspired birthday party. I wanted to make her party unique and I also wanted to only create decorations that I could use again in my regular home decorating. This is when I came up with these "frosted" Christmas trees.

This was a total experiment for me to see if it would work and it worked perfectly so I wanted to share it with you because it's super easy!
SUPPLIES:
- styrofoam cones - tree shaped
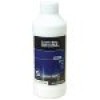
- gesso
- white acrylic paint
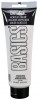
- modeling paste
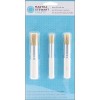
- paint brush (I'm using a stencil stipple)
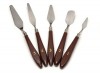
- pallet knife
- pallet paper or craft mat

STEP ONE: paint the tree with gesso... I wanted a primer base because I wasn't sure how the modeling paste would stick to the styrofoam. I thought it was better safe than sorry to have that gesso base to give it some grip.

STEP TWO: paint the tree with white acrylic paint. This is totally optional, I just wanted Titanium White base color in case I missed any of the tree in future steps since I wanted the final tree to be solid white.

STEP THREE: spread on the modeling paste all over the tree. I had to do this in sections letting parts dry before handling it to do another section. You just spread it on like frosting. It actually looked so much like frosting that some of the parents asked if it was frosting. Looked yummy, but I'm sure doesn't taste as good as it looks.

STEP FOUR: (optional) The modeling paste had a gray tint to it, plus it had flecks of paint in there from old paint projects. To make it a solid white, I painted on a coat of Titanium White acrylic paint to finish it off.

I'm looking forward to making my little 3D tea light village for Christmas decorating and using these trees as part of the decorations. I love doing projects that I can reuse in other home decorating and not just the party.
~~~~~~~~~~~~~~~~~~~~~~~~~~~~~~~~~~~~~~~~~~~~~~~~~~~~~~~~~~~~~~~~~~~~~~~~~~~
Here are some other photos from her party decorations.
blue velvet cupcakes with blue raspberry frosting - wrapped with an Ice Queen crown

Blue Raspberry Lemonade w/ Vanilla Ice Cream Snowballs, in my icicle punch bowl

Frozen Hearts - there's a jar of Hershey Kisses next to them to "thaw a frozen heart"

side view of the table

- my hubby made me a wood frame to make this backdrop... It was so much fun hanging tulle and snowflakes from the top. I strung the snowflakes with clear fishing line. There was a blue paper background covering the whole frame, then I stapled lights to the frame. Next, I stapled white linen on the back and draped it over the top. I then used fishing line and tied it between the windows' curtain rods. I then hung the tulle and snowflakes from it. I LOVED how it turned out.


This blog post and tutorial are a day late because in addition to her party, we had two other Christmas parties this weekend and I pretty much crashed and decided it was ok to be a day "late".
Disclosure: This post contains affiliate links. I will receive a small commission on purchases made, using my link. Thank you for your continued support in keeping this blog running and to help purchase supplies for the tutorials and inspiration!


0 comments:
Post a Comment