Hey there, I'm so excited to be back to a regular schedule again after last week, that means a new mixed media tutorial today. Last week, with the grand opening of my Etsy shop and then working on a HUGE (literally) project at my church, and the kids all being sick with the sniffles, I just couldn't keep up with the blog. I'm hoping to be back to a regular schedule again this week.
I don't know about you, but I LOVE pattern. I have a closet full of fabric and a huge stack of pattern paper. I just love seeing the repeated pattern and I'm finding that I really like repeated pattern in my art journals too. While I was picking up a few things at Michaels this weekend, I picked up a container of foam stickers and instantly saw some fun stamp making materials for creating some fun patterns.
Did I tell you that in addition to my art journals and fun planners, I also have an art planner? Yeah, I'm kind of a planner addict! I just ordered a pocket-sized FiloFax to use as a wallet since my current wallet is falling apart. I'm also in the process of making a journal planner, aka a faux-Midori.
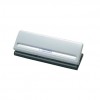
Anyways, I love this art planner for trying out different patterns and designs. It's seriously so fun to play in. It's just filled with 8.5" x 11" paper cut in half and hole punched to fit. I LOVE that it's the same hole spacing as my FiloFax, so if I like a pattern, I can pull it out and stick it in my regular planner. Plus, I LOVE my adjustable 6-hole punch!
So today, I'm showing not just how I created this foam flower stamp, but how I use my art planner too.
SUPPLIES
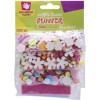
- foam sticker shapes - I chose flowers
- cardboard - I just cut down a mailer from the recycle bin
- paper - I'm just using white cardstock
- paint - I used cheap acrylic paint
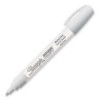
- Sharpie Poster Paint Pen - medium, or white acrylic paint with a small brush
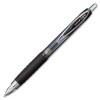
- Black pen - I'm using my fave Uni-Ball Signo Signo 207 (Bold)
- Faber-Castell Big Brush Marker in green (optional... you can use paint and a paint brush too)
~~~~~~~~~~~~~~~~~~~~~~~~~~~~~~~~~~~~~~~~~~~~~~~~~~~~~~~~~~~~~~~~~~~~~~~~~~
- STEP ONE: pick out the shape you want, and cut down you cardboard piece
- STEP TWO: peel and stick the foam stickers
- STEP THREE: pour out a little paint on your craft sheet or palette/palette paper and dab on to your foam stickers. I just used my finger.
- STEP FOUR: press down onto your paper, lift up
- STEP FIVE: repeat steps THREE and FOUR until you've filled your paper.
- STEP SIX: dab on white paint in the centers of your flower.
- STEP SEVEN: outline all the flowers with your black pen
- STEP EIGHT: add little black dots to the centers of the flowers. I actually thought I was done at this point, and put this away in my art planner.
- STEP NINE: using a green marker or green paint with a small brush, add the leaves to your flowers.
- STEP TEN: doodle the leaves too, outline and add the center lines
I'm definitely happy that I took it back out of my art planner and added the leaves. I'll probably pull it out again and add some color in between the flowers with some watercolor or gelatos. What I love is now I can easily make these flowers all over my other patterns. I think I may add a word to this and add it to my regular FiloFax planner.
Disclosure: This post contains affiliate links. I will receive a small commission on purchases made, using my link. Thank you for your continued support so I can continue to provide tutorials and inspiration!







Wildflower cases nz Pretty good post. I just stumbled upon your blog and wanted to say that I have really enjoyed reading your blog posts. Any way I'll be subscribing to your feed and I hope you post again soon. Big thanks for the useful info.
ReplyDeletePleasant post! This is an extremely pleasant blog that I will absolutely return to more occasions this year! A debt of gratitude is in order for instructive post. Integral Foam Manufacturers In Michigan
ReplyDeleteMetalized BOPP film has become a standard packaging material because it provides both outstanding barrier protection and visually appealing design. Many companies now rely on it to enhance product shelf life while maintaining a premium look. The main use of this material exists in food packaging because both product freshness and package attractiveness must be preserved. The cosmetic and personal care sectors use Metalized Bopp Film to achieve a reflective surface which creates an eye-catching effect that attracts consumers. The wide range of applications for metalized Bopp film in modern packaging solutions demonstrates its ability to create durable product displays and multiple other functions.
ReplyDelete