
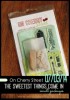
I'm still working away at creating fun 4th of July goodies for my Week 27 pocket scrapbook page. I had so much fun using all the star stamps I have from the recent Sweet Stamp Shop and On Cherry Hill releases. I just adore white stars with a navy background and this tutorial is so easy and fun!


SUPPLIES:
- paper or journal card
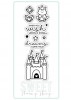
- favorite stamps
- clear embossing ink
- embossing powder
- mists or spray inks
- baby wipes or paper towels
- heat tool
- palette paper or craft mat
I'm using old book paper that has been gessoed. Gesso creates a resist also, so I had to repeat several of the steps below until I was happy with the color. If the paper is naked, you wouldn't have to do so many layers, tho, it would be more difficult to blend the colors. I used white embossing powder, but you can use color if you want too. I like the VersaMark brand embossing ink the best. I'm also using all the stars from the recent On Cherry Street kit and coordinating Sweet Stamp Shop stamp sets. Lastly, I'm using Heidi Swapp Color Shine in Navy and Teal.
HOW TO
STEP ONE: Ink up your stamps with Clear Embossing Ink
STEP TWO: stamp down on your paper (repeat steps one and two until you fill your paper)

STEP TWO(b): turn your stamps around for variance

STEP TWO (continued): fill your paper

STEP THREE: pour white embossing powder all over your whole paper, making sure to cover all the stamped images

STEP FOUR: dump the loose powder back into the container

STEP FIVE: Use your heat tool to melt the powder, you will see the transition happening when it goes from grainy to smooth

STEP SIX: Start spraying your mist over your paper

STEP SEVEN: Start wiping and spreading the mist using a baby wipe or paper towel... you will see the images appear and the paper soaking up the color.

STEP EIGHT: Repeat steps six and seven several times until you like the color

FINISH

I dipped my stamps in the leftover ink on my palette paper and stamped them on top of the paper for more yummy stars.

I then trimmed it down to 4"x6" and I love how it turned out. I can't wait to add it to my weekly pocket scrapbook album!

CREDITS:


Disclosure: This post contains affiliate links. I will receive a small commission on purchases made, using my link. Thank you for your continued support!


0 comments:
Post a Comment