

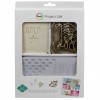
When the Heidi Swapp Project Life® line came out at Michaels, I just had to have the Color Magic Value Kit for the watercolor paper and the yummy canvas and wood veneer words. Of course, I LOVE the color magic cards too.
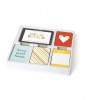
The first thing I thought when I saw the "GOLD (star)" card was how awesome it would be to make it gold and to use it as a stencil too. I did just that and here's a quick and simple tutorial on how I created these two cards.

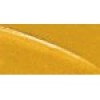
- STEP ONE: Using your palette knife, scoop out a little bit of the gold modeling cream.

- STEP TWO: Spread it over the cut out journaling card that I'm using as a stencil onto the card underneath. I wanted a little bit of texture so I didn't smooth it out and tapped it after filling the stencil completely in.

- STEP THREE: Separate the cards.
- STEP FOUR: Spray/mist Heidi Swapp Color Shine over them in Mustard and Gold. Blot them with a paper towel and spray again until you're happy. The patterned card I only misted with gold. I love the added texture from the paper towel when I blot it.


Disclosure: This post contains affiliate links. I will receive a small commission on purchases made, using my link. Thank you for your continued support in keeping this blog running and to help purchase supplies for the tutorials and inspiration!
No comments:
Post a Comment